

Updated for 2022
Hey latte, cappuccino, flat white, cortado, and macchiato lovers, Marc here from Whole Latte Love. Today I’ve got 5 tips to help you get the best froth for your milk-based espresso beverages, including some bonus content with our test results for 10 dairy and non-dairy milks. Find out what types of milk are best based on frothing quality, pouring quality, and taste.
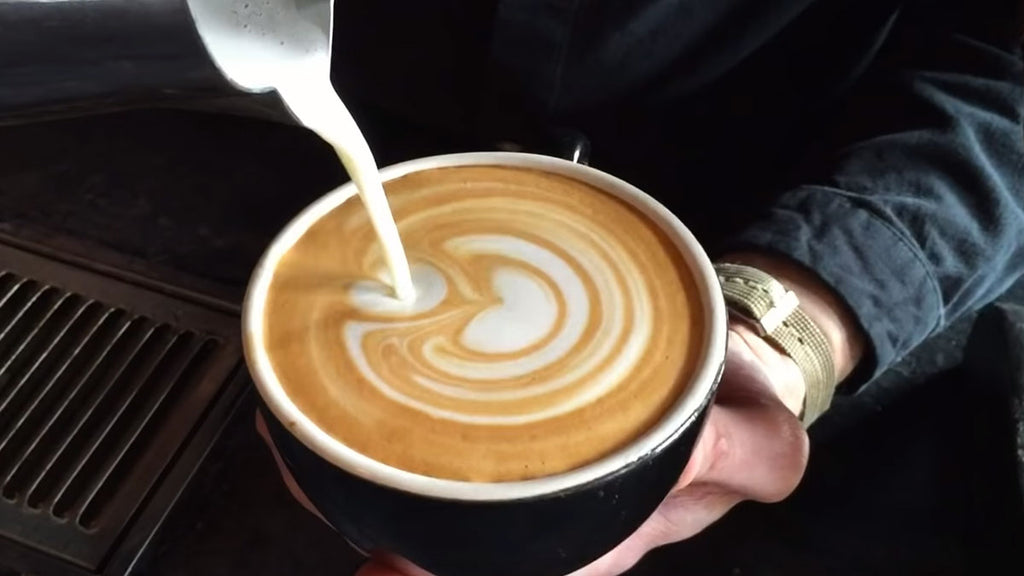
Coming up in this blog, I’ve got some pictures comparing the differences in technique for producing a barista quality, super-fine froth for pouring latte art compared to a dryer, airier milk foam for a traditional cappuccino. In addition, if you’re on a quest to become a latte art DaVinci, get the basics down in this blog, then use the link here to watch our video: “How to Froth and Steam Milk for Latte Art and More”. With nearly 3 million views, it’s definitely a must-see if milk drinks are your thing. It’s a classic step-by-step guide to producing great tasting and beautiful looking milk-based espresso beverages. In that one you’ll learn how to pour latte art including a heart, rosetta, and tulip.
There are five topics I’ll cover in this video:
Now in this blog I’ll be focusing on manual steaming, but if you’re using an auto-frothing wand there’s plenty of information here for you as well. Beyond that, see these videos on how to get the best from auto-frothing steam wands.
Best Practices
If you're new to frothing, I advise you to start with a 12 oz pitcher, that’s about 350 ml. It’s got enough volume to do milk for a larger latte, it’s easy to handle, and even most entry-level budget machines should have enough power to steam milk in these. I’ve got a variety here from the classic Rattleware Latte Art Pitcher and some look-alikes, on up to the Espro Toroid with a design to help encourage milk rotation that may benefit machines with less steaming power.
Always start with milk that’s as cold as possible — it takes air better, and gives you more time to work it. Some people even store their pitchers in the freezer. For fill level, try going to just below where the spout starts to form. In these size pitchers, that’ll get you about 5 or 6 ounces, enough for a large latte. If that’s too much, you can go with less, but you probably don’t want to add more as the milk will expand when frothed.
Before steaming, make sure your machine is up to steam temperature. This is especially true with single boiler machines, which can take a minute to get there after flipping the steam switch. A tip for getting a little more steam out of some single boiler machines: once you know how long it takes for the machine to get to steam temperature, you can start steaming a few seconds before the machine indicates it’s reached full temp. Doing that with many single boiler machines will cause the heating element to stay on, generating more steam while you’re frothing. If you wait until the machine indicates it’s ready, the element will probably turn off and stops generating steam while you’re frothing. That doesn’t work with all single boilers, especially those with thermoblocks, but give it a try with yours and you might get a little extra steam power.
Other best practices come down to what I’ll call purge, wipe, purge. Purge your wand immediately before steaming to remove any water that’s in the steaming circuit. You don’t want that extra water in your milk. Then as soon as you’re done frothing, use a towel to wipe your wand before milk has a chance to bake on. Then, purge again. The final purge is very important. When you finish steaming the tip is still in the milk. As the wand quickly cools, milk is drawn up into the wand but that final purge gets the milk out. We have had cases where people didn’t purge properly and milk can get all the way back to the boiler, and that’s a stinky mess. So always purge after steaming.
To recap best practices:
Temperature
Before I get to the technique of steaming, I want to talk about proper milk temperature. So the whole idea behind frothing milk is creating a sweet, creamy texture. Heating milk increases its apparent sweetness, but only to a point. Now, if you’re newer to milk-based espresso beverages, you might be expecting a temperature closer to a regular drip style coffee. That should never be the case.
Milk is at its sweetest from 135-150°F. That’s 57-66°C. As you go hotter, you lose the sweetness. If you go too hot, you’ll scald the milk. To get the proper temperature you can use a frothing thermometer or do it by feel. If using a thermometer, be aware of lag. After you turn off the steam you can expect the temperature to rise as much as 10°F or 5°C, so cut the steam before you see your desired temp on the thermometer. If judging temperature by feel, you’ve hit the sweet spot when the outside of the pitcher is just beginning to get uncomfortable to hold due to heating. So that’s when you want to cut the steam.
Frothing Technique
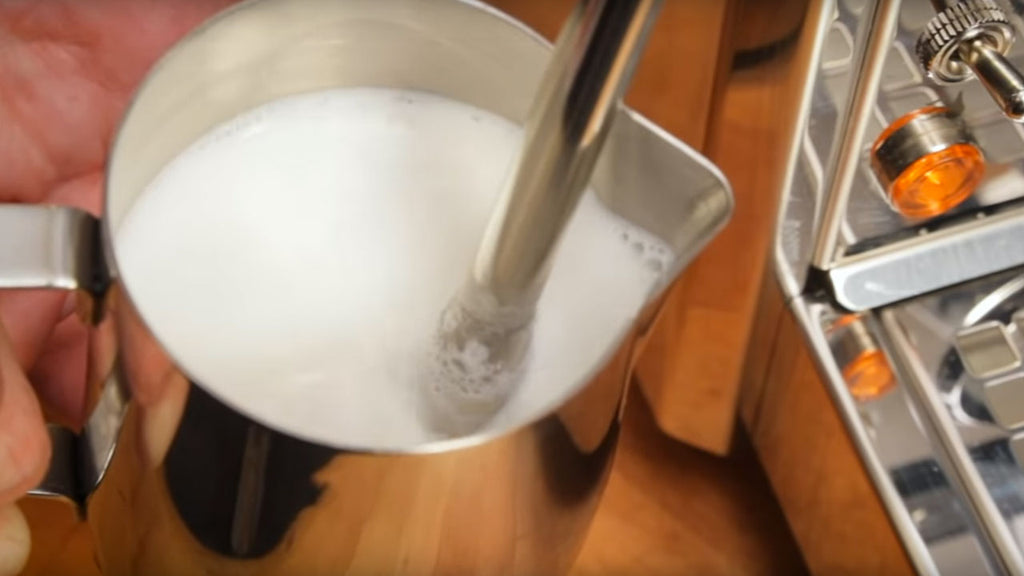
Frothing technique is all about finding the proper steam tip position relative to the surface of the milk. Too low in the milk and you won’t get enough air in. Too high and you’ll either get too much air in or make a big mess. So the idea is to start with the steam tip just below the surface of the milk. Then adjust the depth so you hear the occasional rip, which indicates small amounts of air being sucked into the milk.
Now, whether you want a super-fine micro-foam for a latte or an airier froth for a traditional cappuccino, the start of the process is the same. You want to get rips of air in as soon as possible. Milk takes in air better when colder. For a fine latte froth all air should be in by the time the outside of the pitcher starts to warm. At that point you position the wand a hair deeper into the milk and find a tip position and angle which causes the milk to roll. That roll helps break up any larger bubbles and mixes the milk to create a uniform texture through the pitcher.
For airier cappuccino froth you can continue sucking in rips of air a little longer and judge the froth by its expansion in the pitcher. When you get the desired volume, lower the wand into the milk a hair and continue rolling. When you’ve reached your desired temperature, shut the steam off with the tip still in the milk, remove the pitcher, wipe down the wand, and don’t forget that final purge to get residual milk out of the steam wand.
After steaming, if you find you have some larger bubbles you can knock and swirl the pitcher a few times to help break up and mix those.
To recap frothing technique:
Milk Type
In a second I’ll get to how you can practice all this without using any milk, but first a quick look at dairy and non-dairy milk types and ratings based on our frothing, pouring, and taste tests.
Some notable results: whole fat dairy milk is the gold standard. It scored 5/5 in frothing, pouring and taste for 15 points total. Our dairy milk runner up was a surprise. It was Lactaid milk, which scored 14/15 points, slightly edging out two percent milk, which had a score of 13/15. Our testers really liked the sweetness of the Lactaid milk.
We had another surprise in non-dairy milks. Now almond milk is one of the standard milk alternatives in coffee shops. It scored 8/15 points, slightly edging out another popular alternative, soy milk, which scored 7/15 points. Our winner in non-dairy was macadamia milk with 11/15 points. Non-dairy milks typically fall short in frothing, but our testers liked the sweet nutty aroma of the macadamia milk.
Get our complete results, including testing of cashew, oat, coconut, and that goat milk, which froths well, but putting it nicely was face-twistingly overwhelming.
Practice
So, you really want to improve your frothing skills or practice latte art. Well, here’s how you can do it all day long without using any milk or espresso. For the milk just use plain water and add a drop or two of dish soap. That combination behaves nearly identically to milk when frothed.
We had Sapphire, a local barista who does incredible latte art, in the studio a while back and she gave us a really cool technique to practice pouring. Just add a drop of food coloring to a couple ounces of hot water in a latte cup for contrast and then use the soapy froth to pour your art. Anyone for a blue latte? Ya, you don’t really want to drink that one, but you can practice all day long and your equipment will be extra clean — just don’t forget to purge that steam wand.
I’m Marc, thanks for reading and I invite you to come back soon for more of the best on everything coffee brought to you by Whole Latte Love.