

There’s nothing like the satisfaction that comes with making a really great cup of coffee, and Brewista’s line of brewing products can help you experience that feeling every morning. Brewista’s brand is focused on the little details to help you get the best possible cup of coffee, whether that’s with a high-quality scale or an elegant pour over dripper.
I had the chance to try out their brewing-focused products, including their cupping supplies, scales, kettle, pour over dripper, and carafe, and I made some great coffee using their products. In another piece, I tried out their espresso accessories, and I similarly enjoyed what I created with Brewista’s products. Here’s what I learned while brewing with Brewista.

After brewing into the X Series Glass Server.
Cupping With Brewista
As someone who’s new to the world of coffee, I had never heard of cupping until I was trying out these products. The process of cupping is meant to let you evaluate the flavor and quality of freshly roasted coffee to figure out the tasting notes. Brewista’s cupping bowls are designed to help you get the most out of the cupping process with small details like dark brown colored interiors to make sure you aren’t tasting the coffee with any preconceived notions due to its taste.
-
 Brewista Professional Cupping Spoon Overview The Brewista Professional Cupping Spoon, with a stainless steel accent, is the ideal tool for coffee connoisseurs looking ...
 -
 Brewista Cupping Bowl with Silicone Lid Overview With the Brewista Cupping Bowl with Silicone Lid, made from hand-crafted porcelain, expect a more durable and improved...
 -
 Brewista Professional Cupping Spoon Overview The Brewista Professional Cupping Spoon, with a black accent, is the ideal tool for coffee connoisseurs looking to try new...
 -
 Brewista Professional Cupping Spoon Overview The Brewista Professional Cupping Spoon, with a gold colored accent, is the ideal tool for coffee connoisseurs looking to ...


The included lids help make sure that you’re properly steeping the coffee and provide a convenient resting place for your cupping spoon after you’ve scooped the floating coffee off the top of your samples while you’re waiting for it to cool enough to evaluate properly. The head of each cupping spoon is slightly deeper than the average spoon, so you can scoop a solid sip of coffee to help you evaluate the flavor as well.

The cupping process just before breaking the crust.
I followed the SCA best practices when I was cupping, with 8.2g of coffee and 150ml of water heated to 203 degrees, which was easy to do using Brewista’s Artisan Gooseneck Kettle. The kettle makes it easy to know exactly what temperature your water will be, and you have the option to pre-program nine different temperatures. The kettle comes with nine temperatures already programmed in, but you can easily change these settings or manually adjust them. If you’re a home roaster and you cup your coffee routinely, you can make one of the settings 203 degrees Fahrenheit so you can make sure you’re being consistent. I measured out my water using a measuring cup I already had in my kitchen, and I made sure to pre-heat that glass measuring cup before pouring since the water was so hot to make sure the glass didn’t break.
I weighed my coffee for the cupping process using Brewista’s Smart Scale II in mode 1, which is the fully manual setting. Though you’re meant to cup with freshly ground coffee, I wanted to see what the difference would be as someone who has never cupped coffee before, so I made 3 cups – 2 that held a fresh Ethiopian home roast and one that held Whole Latte Love’s Crema Wave beans.

The grind consistency used for cupping.
Once I had my entire setup ready to go, I let the coffee steep for 4 minutes, broke the crust, removed the floating grounds, and let it cool for another 12 minutes before testing it out as the SCA recommends. Brewista’s cupping spoons made it easy to break the crust and move it to the side to make scooping the crust easier because of the curve on the head of the spoon. I found that the flavors of the Crema Wave were more muted in the cupping process, which made sense considering I wasn’t using a very fresh roast of the Crema Wave.
On the other hand, the flavors in the fresh Ethiopian coffee became more obvious during the cupping process. I tasted flavors from the cupping process that were significantly more subtle when I brewed the same coffee with the Brewista Tornado dripper and when I pulled it as espresso on the Gaggia Classic Pro. Blueberry notes were the most obvious in this roast, but there were also hints of cherry and tropical fruit.

The Brewista Cupping Spoons in action.
Brewista’s cupping products were great during the cupping process. I really like that the interior of the cupping bowls is a chocolate brown color to negate any preconceived notions I may have had based on the appearance of the coffee. I will note that the more brightly colored cupping spoons influenced my palate to an extent, especially the silver and gold options. With the black metal, the exact color of the coffee still wasn’t obvious, so there wasn’t any bias based on the contrast of the dark liquid against a light spoon. Since visual perception can influence how we perceive the flavors and bitterness of coffee, this is something to keep in mind.
Pour Over Brewing
-
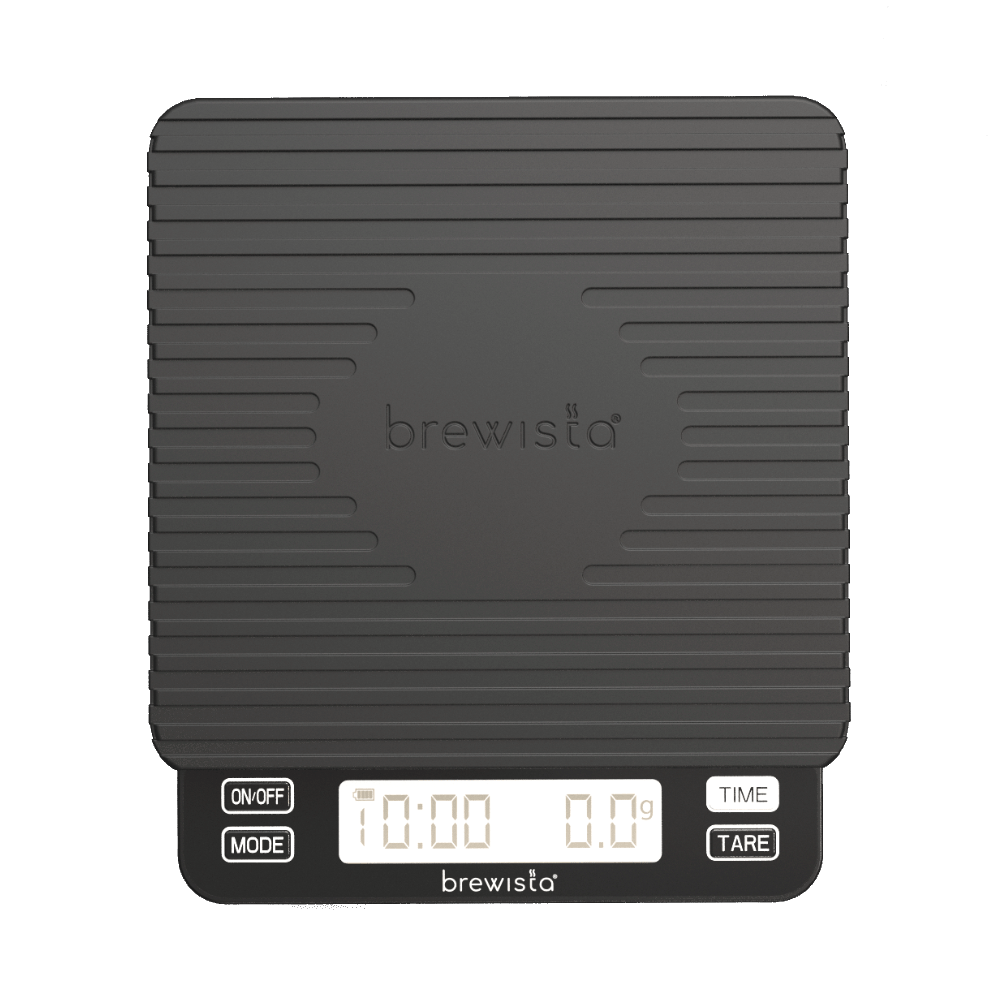 Complete Your Set-Up with the Brewista Smart Scale II The Brewista Smart Scale II is a competitive multi-purpose scale with a suite of operating modes for both espress...
 -
 The Brewista Ratio Scale is a multi-purpose stainless steel hexagonal scale with an innovative sensor that precisely calculates coffee to water ratios and even water pouring speed.
 -
 The Brewista Tornado Double Wall Glass Dripper is a gorgeous brewing device that’s equal parts cool and practical. The 18 rib design slows the water during pour overs for more robust extractions and the sealed design makes cleaning a breeze.
 -
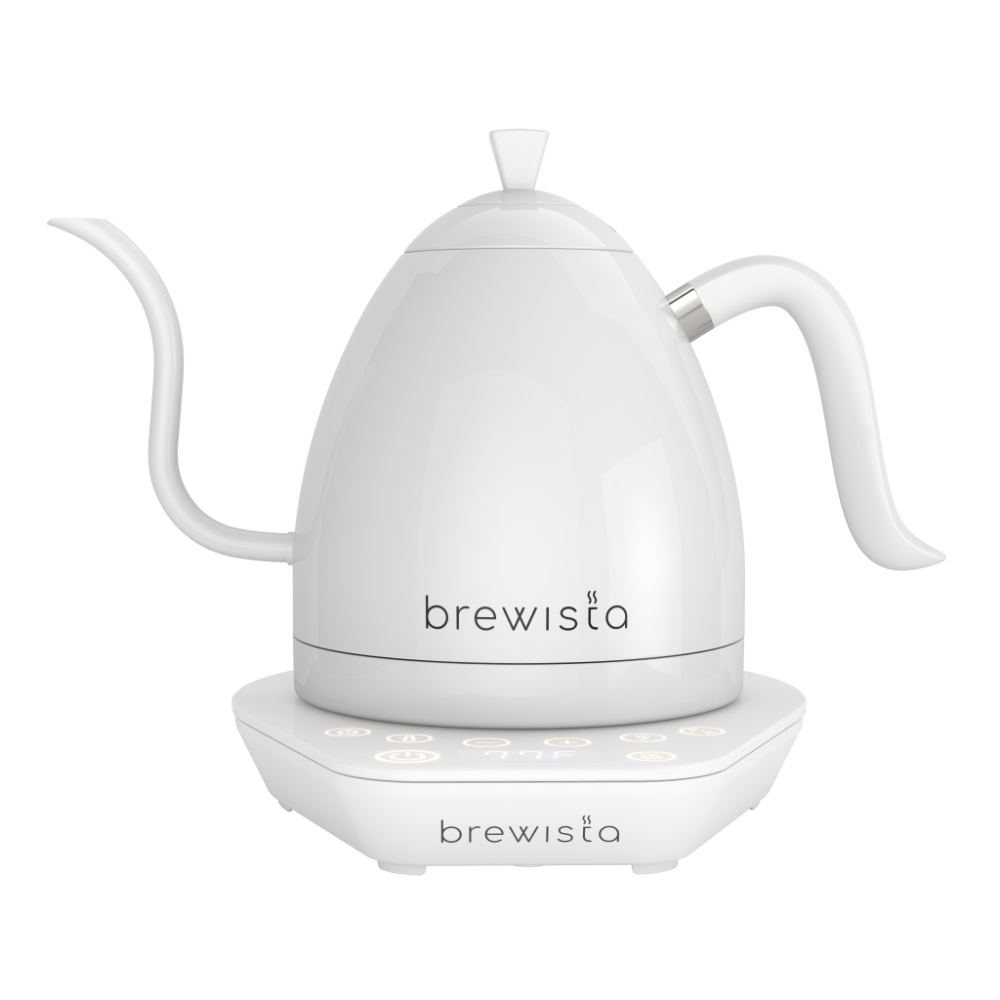 The Brewista Artisan Electric Gooseneck Kettle features an ergonomic handle and gooseneck spout to make pouring easy and comfortable. The Artisan Kettle also uses an electronic temperature control panel with 9 common presets and full adjustability within 1 degree.
 -
 Brewista took inspiration from wine decanters to bring coffee lovers the X Series Glass Server. The wide base and diamond, polygonal shape oxygenates brewed coffee for a balanced end product.


The first thing that had me excited to use the Tornado Duo Double Wall Glass Dripper and X Series Glass Server was how gorgeous they are. The Tornado is made with borosilicate glass, which means it won’t crack due to sudden, extreme temperature changes that can happen during the brewing process. It is also dishwasher safe, though Brewista recommends handwashing the Tornado. The unique design of the Tornado isn’t just for aesthetic purposes – it also slows down the extraction process and creates a well-balanced, smooth cup of coffee.
The dripper also comes with a small plastic holder, so after you remove it from whatever carafe you’re using you don’t have to worry about dripping coffee on the counter. It also makes storing the Tornado easier, whether you’re putting it away in a cupboard or letting the gorgeous design shine on a counter or in a display case.

Pouring with the Artisan Gooseneck Kettle into the Tornado Dripper and X Glass Series Server on the Ratio Scale.
The X Series Glass Server carafe has a polygonal design that Brewista designed to help balance your coffee, and the functional design also makes the server more aesthetically pleasing. The included lid has a sealed rim to help keep coffee warm when it’s in the server, and the curved spout makes it easy to control your pour. When placed together, this dripper and server are gorgeous and add some elegance to your morning coffee.
Since the Tornado is meant to make 1-2 cups of coffee, I decided to opt for 25g in and 400g out to match the 1:16 ratio that I prefer for pour over coffee. I brewed with the fresh Ethiopian roast that I used for cupping, and I noticed the dripper was able to pull out a majority of the notes I noticed during the cupping process, though they were more subtle. The blueberry was the most obvious, though the cherry notes made an appearance as well.

Grinding for pour over with the Eureka Brew Pro Grinder and Eureka Hand Brew Cup.
I used the Artisan Gooseneck Kettle for my pour over brewing, and overall I found it easy to control, program, and use. As I mentioned earlier, you can program nine different temperature presets, which is very helpful if you’re brewing first thing in the morning. Once the kettle is on, it’s easy to choose what temperature you want it to heat the water to, which helps with repeatability. There’s also a flash boil setting that will very quickly bring the water in the kettle to a boil, though the normal heating time is also quick.

The display on Brewista's Artisan Gooseneck Kettle.
I found that if I turned on the kettle and then got the rest of my pour over setup ready to go, it would be heated up by the time I was ready to start pouring. Make sure if you’re doing other things while waiting for the kettle to heat up that you toggle the keep warm button, though – otherwise the water’s temperature will start dropping after it hits a certain temperature.
The Brewista Scales
I tested out this dripper and server combo with two different scales – the Brewista Smart Scale II and the Brewsta Ratio Scale. While using the Smart Scale II, I used mode 6, which is the pour over mode. The majority of the settings for this scale are for espresso purposes, which you can learn more about here. In mode 6, the scale will auto-tare when a pour over device is placed on it so you can measure out your coffee, and after you have the right amount of coffee, you hit the tare button to get ready for brewing.
Once the water first hits your grounds, it will automatically start the timer on the scale, so you can make sure you’re blooming your coffee for the right amount of time as well as keep track of whether the brewing process takes too much or too little time. I found this setting easy to use, and if you also brew a lot of espresso, this scale is a great option.

The Ratio Scale is meant to be used specifically for pour over brewing. The scale gets its name from its unique ratio settings, which will let you program a ratio from 1:14 to 1:20 to help you make sure you’re getting the perfect brew ratio every time. It’s really easy to adjust the ratio, you just have to make sure you do it before you start brewing. You can choose to use a fully manual or a fully automated function, and though it has fewer modes than the Smart Scale II, these two modes are all you will need for great pour over brewing.
In the manual mode, you have to tare your brewing vessel, add your coffee once the small bean icon appears, hit the ratio button, then hit the timer and start brewing once the small kettle icon appears. With the automatic function, the main difference is that the scale will automatically tare your vessel and automatically start the timer once water hits the grounds. Other than those two changes, the two settings remain the same for this scale.

The Tornado Dripper and X Series Glass Server on the tared out Ratio Scale ready for coffee to be added to the pour over dripper.
After you’ve hit the ratio button to tare your coffee grounds, the Ratio Scale will tell you exactly how much water you need to add to your pour over brewer to get the perfect amount of water in the brewing process. This feature is extremely helpful if you want to get just the right ratio of coffee to water but don’t want to do the math for every small variation in how much coffee you’re adding to your brewer. Whether you’re experimenting with a different size pour over brewer or just have a slight variation of a few tenths of a gram in the amount of coffee you’re brewing, the Ratio Scale will be able to keep you from adding too much or too little water during the brewing process.
Other details that make the Ratio great for brewing include the fact that the screen will start flashing when you come within 60g of the ideal amount of water added. This can help you be alert so you don’t overpour, and the screen will turn white once you’ve reached the right weight for the ideal coffee ratio.
The only issue I experienced with the scale was purely user error – I accidentally hit the timer button when the scale was on automatic mode, which made the timer not actually start when the water started being poured into the brewer. Other than that small self-made issue, I didn’t run into any surprises with the scale whatsoever, and I found it very beginner-friendly as someone relatively new to the pour over world.
In Conclusion
As a whole, I could tell that Brewista’s products were designed with an eye for the little details that matter during the brewing process. Not only will you get great coffee out of their dripper, get precise measurements and ratios with their scales, and have a reliable and convenient way to heat water with their kettle, but all of their products are aesthetically wonderful as well. While testing these products out, I really loved seeing them every time I was in my kitchen. The clean lines and minimalist design of these products is wonderful, and the way they pared down the functionality of their devices to make them easy to use without losing any vital features of each product is wonderful.
Have you brewed with a Brewista product in the past? Make sure to leave a review on the product pages so that others can see what you think of the products. And make sure to follow Whole Latte Love on Instagram, Facebook, Twitter, and YouTube and subscribe to our email list to stay up to date on our latest products, promotions, and deals!