5 Milk Frothing Tips for Beginners
Emilee Bryant is a competitive latte art champion, trainer, and barista with a very popular YouTube channel. She was generous enough to provide 5 tips she teaches to folks who are new to milk steaming. But really, we can all use some advice from Emilee.

Steaming quality milk is a notorious hurdle that all baristas will have to leap over, but today we are going to lower that barrier of knowledge. As a ten plus year barista myself, I have gathered my top 5 points for you to know that will take you from walking in the dark to out-steaming your local coffee shop. Follow along and you’ll be able to evaluate common issues, have an awareness of the machine you use, and will develop a technique that you’ll carry for a lifetime on any machine you might encounter.
Steaming Milk Technique
Anyone can steam milk like a pro barista. It just takes a little technique and consistency.
Setup and Positioning
For steaming, the best method is to recreate the same positioning and phases every time. When I teach, I teach the same angle of positioning for the steam wand for all machines, and this is to create that consistent routine no matter where you are in the world.

First, you'll want to ensure any water has been expelled from the wand by covering the tip with a towel and letting out a burst of steam into the tray. We do this to avoid that water, formed from collected steam in the wand, ending up in your milk later.

After purging the wand, pull it directly out towards you: no side angles, no aggressive tilts, just directly out at a 45-degree angle. Next, to ensure stability in the steaming process, attach the spout of the pitcher to the steam wand to help lock it into place. This ensures no random movements are induced during steaming, since the wand and pitcher are fixed to one another.

Dip the steam wand tip roughly 3/4 of an inch under the surface of the milk, directly in the center, while keeping the pitcher's bottom parallel to the table. Next, tilt the pitcher itself to one side (doesn't matter which) so the steam tip sits between the wall of the pitcher and the center and the base is no longer parallel to the table. This angle will change depending on the machine, but the overall positioning stays the same across all techniques.
Aeration
The steaming itself is the hardest part, and it happens in two phases: aeration and texturing. Aeration happens first and should be the number one priority at the beginning of steaming. The longer the bubbles have been in the milk, the longer they have to break down and become silky smooth. During aeration, there are a few goals to keep in mind: the intensity of the air added, the amount of air added, and the sound. This is the differentiating concept between a new barista and a seasoned pro.

First, let's tackle the air itself. The air doesn't come from inside the wand (as we know, it's actually just steam). It instead comes from the steam gently puncturing the milk surface, creating turbulent bubbles that get trapped in the milk proteins. To allow for this, as soon as the steaming process starts, gently lower the pitcher until the steam tip is just barely near the surface and a paper-tearing sound commences. Some say it sounds like paper tearing, I personally think it's closer to a hundred-dollar bill. You be the judge.
And it's not a single tear we want, we want multiple tiny tears of air to give us more control over how much air we add. We can always add more, but can’t take away air.

To do this, keep the pitcher in the aeration position but gently tilt it down and up a few millimeters to stop and start the gentle injections. The gentler the air injection, the smaller the bubbles, and the better your microfoam will be.
Not all machines are created equal, so the aeration period shouldn't be based on any specific time (3 seconds, 5 seconds) but rather on the sound and volume changes of the milk. The more air, the larger the volume, and the more air, the less screeching sound you’ll hear during the steaming process. Finding the balance is ultimately a personal preference and can be adjusted to taste and beverage type.
Lastly, aeration can stop at any point prior to the pitcher feeling warm to the touch (or around 100°F, close to skin temp). Anything past that gives less time for new bubbles to fully break down and ruins the milk texture and taste.
Texturing

To enable the next phase and stop aeration, simply re-submerge the steam tip to its 3/4-inch position under the milk surface. Let the milk roll in its self-made vortex until it reaches your desired temperature. For the best taste, stop at 140°F and no hotter than 155°F as temperatures past this range will degrade both the texture and flavor of the milk.

Turn off the steam wand, remove the pitcher, and immediately wipe the steam wand down with a wet towel. Then, like our start, we purge out some steam into the tray to prevent any milk staying in the wand.
Choosing Your Milk

The right milk is the milk you like, but here's the best info for a buttery texture so you can decide what fits your taste.
For dairy lovers, the idea is simple: proteins create our foam when we add air. Heating the milk allows the proteins to unfurl and wrap around bubbles, but they don't only attach to air; they also have their eye on fat. Fat is a destabilizer to foam. So the more fat, the fewer bubbles, but the tighter the network of bubbles that exists and the smoother the mouthfeel. So, although fat is a destabilizer, it has some perks.
Less fat means the proteins can focus all their energy on the air, but that's a catch-22, because your bubbles end up coarser in size and drier in texture. No fat means no fatty mouthfeel.

Traditionally, folks like the balance of whole milk or 3% fat for this very reason. Use heavy cream, and the fat will ruin the bubble’s chance of forming. Use skim, and you'll get a stiff, inflexible foam with less mouthfeel. These options are still fine to use, but it's important to recognize the milk's effect and adjust accordingly. For skim, inject less air overall in the beginning. For fattier milks (high-fat whole, cream-tops, half-and-half, and beyond), focus on injecting air longer throughout the aeration phase until desired volume is reached.

As for alternative milks, most common store bought products tend to perform similarly to skim. They struggle to produce tight microfoam and instead produce coarser bubbles, since they're dominated by plant proteins with little fat content. That's correctable by opting for the "barista" versions of these milks. Barista versions compensate by adding back in fat, stabilizers, or both, creating a milk that froths similar to whole dairy. It's not just a fancy word to upsell you; barista alternative milks really do improve the texture and experience.
Choosing Your Pitcher
The best pitcher is, of course, the one you have lying around. However, not all pitchers are created equal. Some pitchers come with leather or rubber sleeves, which are great for protecting your hands from heat, but will inhibit your ability to feel the milk temp. If that's a dealbreaker, try feeling the bottom of the pitcher more deliberately while steaming, or opt for a thermometer attachment to keep the milk in the best temperature range.

Another factor is pitcher size. A good thing to remember is that the volume of the milk will expand when you add air, so for beginners, a larger pitcher allows more room to learn steaming at a slower pace, since the extra volume is more forgiving on how much air the milk can take. But with today's dairy and alternative-milk prices, we want to avoid wasting milk whenever possible, so we should be steaming for the beverage size we actually want.

A 20oz pitcher will be too large for a small cappuccino, and a 12oz pitcher or smaller is too small for a 16oz latte. Finding that "goldilocks" zone comes down to your expectations: the milk in the pitcher should generally sit just under or around the bottom of the spout indent, though some pitchers are unique and that indent might sit higher or lower. There is a fix to this.

The best way to dial this in, and never deviate again, is to simply weigh the milk you use for a couple of beverages until you've nailed the exact amount you need in the pitcher prior to steaming and expansion. Start with a general size of the drink. For example, in a cappuccino, go with a smaller 12oz pitcher and eyeball around the inner spout line. Weigh this sample and make a mental note of the milk height in the pitcher (weight helps, but not all milk weighs the same, so keeping a mental level is more useful long term. Weight gets you 95% of the way there). After steaming and pouring the milk into your coffee, weigh the leftover milk and note how much less you'll need in grams next time. Once you've got the amount dialed in, you'll be able to go off sight for the pitcher you use daily.

You can also make a larger pitcher work if it's the only tool you own by sharing a beverage with a loved one or friend and splitting the milk after steaming. The best way to balance the foam evenly for each cup is to fill the first beverage halfway with milk, then fill the second beverage to the top. Finally, do one last pour to fill the rest of the first beverage. This ensures each cup gets a similar proportion of foam on top, since foam likes to rise, and you'll use it all up on the first cup if you don't split it this way leaving one drink wet and another more foam-forward.
Remember: regardless of the pitcher used, we must always keep the milk continuously swirling in the pitcher after steaming to prevent foam and milk from separating and rising to the top.
Adjusting to Machine
Now that you've learned the technique and positioning of how to steam, we need to adapt to the machine you have at home.
Most espresso machines come with a steaming option, but many work in unique ways and produce different levels of steam power, as well as different steam tips and steam wand holes. It's important you understand the type you’re working with.
The most common difference comes down to raw steam power, or how much energy the machine adds to the milk at any given moment. You might have heard of a few types of systems, such as boilers or thermocoil/thermoblock.

A boiler is simply that: an apparatus that continuously keeps water at boiling and thus fills the remaining chamber with fresh hot steam under pressure. This includes common commercial machines such as La Marzocco and Slayer as well as high end home espresso machines like ECM and Bezzera. Some of these machines even come with a larger hole set in the steam tip (4 to 8) and a larger diameter for each hole, allowing more steam to flow out at any given moment. They're also known to be much stronger when steaming milk and can finish the job in a mere 10-15 seconds.
A very common option for home espresso machines is the thermoblock and thermocoil. Both work similarly to one another to create rapid steam by using small amounts of water heated in a small tube or heated block structure. This produces steam that takes seconds to arrive, versus a boiler needing 10+ minutes to reach stable temperature, coming at a power cost. The lack of back pressure and steam volume of these steamers means less raw power coming out at any given moment, thus longer steaming times (closer to 30 seconds to 1 minute), and smaller steam tip holes, or fewer holes in general, to prevent the steam from failing to help push the milk's vortex. These are often thought of as more beginner-friendly due to the gentle aeration from the tip's hole size and number, as well as the total time it takes to steam.
Another common boiler configuration is the single-boiler, which, like a thermoblock, uses the same boiler for both brewing and steaming. Single-boilers are not often large, limiting the amount of steam it can provide. A heat exchanger on the other hand consists of one large steam boiler with a small tube inside of it that carries the brew water. Dual boiler machines have a dedicated boiler for steam and another for brew water, offering maximum control over the temperature of each boiler. Most commercial machines are either a dual-boiler or heat exchanger.
Steaming Boiler vs. Thermoblock/Coil

Earlier we learned the positioning of the pitcher for steaming. However, for thermoblock/coil type machines, we'll want to exaggerate the pitcher tilt to allow the steam to better push the milk. These machines have a tendency to struggle creating vortexes that help texturize all the air you've already added. Beyond an exaggerated tilt, you can also aid the machine by giving the pitcher a light swirl with your hand to encourage the vortex to start. These wands also take much longer to reach drinking temp, but we can use that in our favor: it gives you more time to focus on the gentle air injections during the aeration phase, and since the steam tip holes are typically small, these injections are very forgiving should a few be too aggressive.

As for boilers, they're here to make beverages rapidly and with roaring power. The technique must be precise to achieve a perfect texture, and the margin for error is much smaller. The positioning should remain the same as our original technique section; too much deviation and the milk could fly out of the pitcher. However, the speed at which steaming takes place rapidly increases. The aeration phase alone drops closer to a 3 second window before the milk gets warm, and the number of air injections in that time is closer to 2 to 5.
Because the steam holes are larger, though, this should still suffice for proper aeration, and the power behind the steam will improve the texturing phase results by continuously mixing down your microfoam. Boilers typically produce less wet foam as well, from a shortened steaming duration and a dryer steam, adding less water preventing dilution of the milk. These actions together leave the milk tasting creamier and a foam structure that is dryer and drains slower over time.
Frothing For Different Drinks
Now that you're calibrated on your technique, milk choice, and machine type, let's ensure you're making the actual beverage you want to make.
In the coffee world there are many names for common beverages (latte, cortado, flat white), and each is a form of steamed milk with espresso in a particular ratio, but some carry different froth levels as well. Starting with the most common beverage: the latte.

A latte is a 10 to 16 oz beverage, and the usual preference is some head of foam present (at least 1/2 to 1 inch). To achieve this amount of foam, we want to fully use the time in which we aerate our milk and focus on those small bursts of air for most, if not all, of that aeration duration. This will ensure enough air is mixed in to create that gorgeous head of foam.

Next, the famous flat white (a contentious drink for sure). Many would argue very little foam should be present. Not no foam, but significantly less than a latte (1/4 inch and under), and this milk will tend to have a wetter overall mouthfeel as a result. To make a flat white, you'll want to reduce the aeration bursts down significantly and only allow enough air that the milk doesn't scream back at you. This should be 1 to 2 very gentle injections on a boiler and 4 to 6 injections on a thermoblock/coil. Of course, increase these amounts if working with fattier milks, and lower the injections if working with skim or low fat milks. Less is more here.
Most other beverages live in between these two options, but one drink eludes even the strongest baristas: the cortado. The definitive way to make a cortado is debated cafe to cafe, but it will often have little to no foam present and a lower drink temp (120 to 130°F), in a small 3.5-4oz glass.

To get this minimal to no foam, I don't recommend adding no air, but instead the smallest possible amount. A single injection on a commercial machine with your gentlest touch and 2 to 3 on a lighter machine. Because the volume of these beverages is typically under any pitcher size, make sure to use a normal amount of milk and ideally share the remainder as a top off to another drink or for a macchiato drinker, to avoid waste. Steaming with too shallow a pool of milk will result in an eruption of air from the steam tip, compromising the texture.
When I am about to pour a cortado, I will dump the excess milk (which also contains some foam) from the side of the pitcher rather than the spout, into another cup or beverage. Then the remaining milk will be the perfect ratio of pure steamed milk and an angel hair thin amount of foam to top the drink off. You won't even see it on the rim, but it'll still have a foam meniscus and can indeed make latte art if you pour gently.
Get Frothing!
You made it to the end! Congratulations on completing your mini masterclass of milk steaming. The cows are gonna love you.
With each of these points in mind, you have all the knowledge needed to successfully approach steaming milk on any equipment you currently have.
While knowledge is key, practice will lead you the rest of the way to perfection in the art of steaming silky milk for yourself or a loved one. Make sure to give yourself grace as you take each drink day by day, and remember: you can come back to this article while you are learning to help reinforce these tips as you go. Let us know any questions you might have while you're learning, and don't be afraid to tag us in your best lattes, we love to see the progress!

Photography by Quinton Marchand
-
 Handmade in the USA, notNeutral’s VERO drinkware marries the style of traditional barware with modern design to achieve a set of coffee and espresso glasses that delivers on aesthetics and performance.
 -
 Create everyday drinks with Harold Import Company’s 12oz frothing pitcher. This pitcher can steam for any milk-based beverage from whole milk to hemp milk. The durable stainless steel construction ensures longevity and durability while the easy-grip handle helps the pitcher to settle comfortably in the hand.
 -
 Steam milk for decadent lattes, mochas, and other milk-based drinks with the 20oz Revolution Matte Black Steaming Pitcher. Featuring a proprietary teflon coating and matte black exterior, this pitcher is built to last.
 -
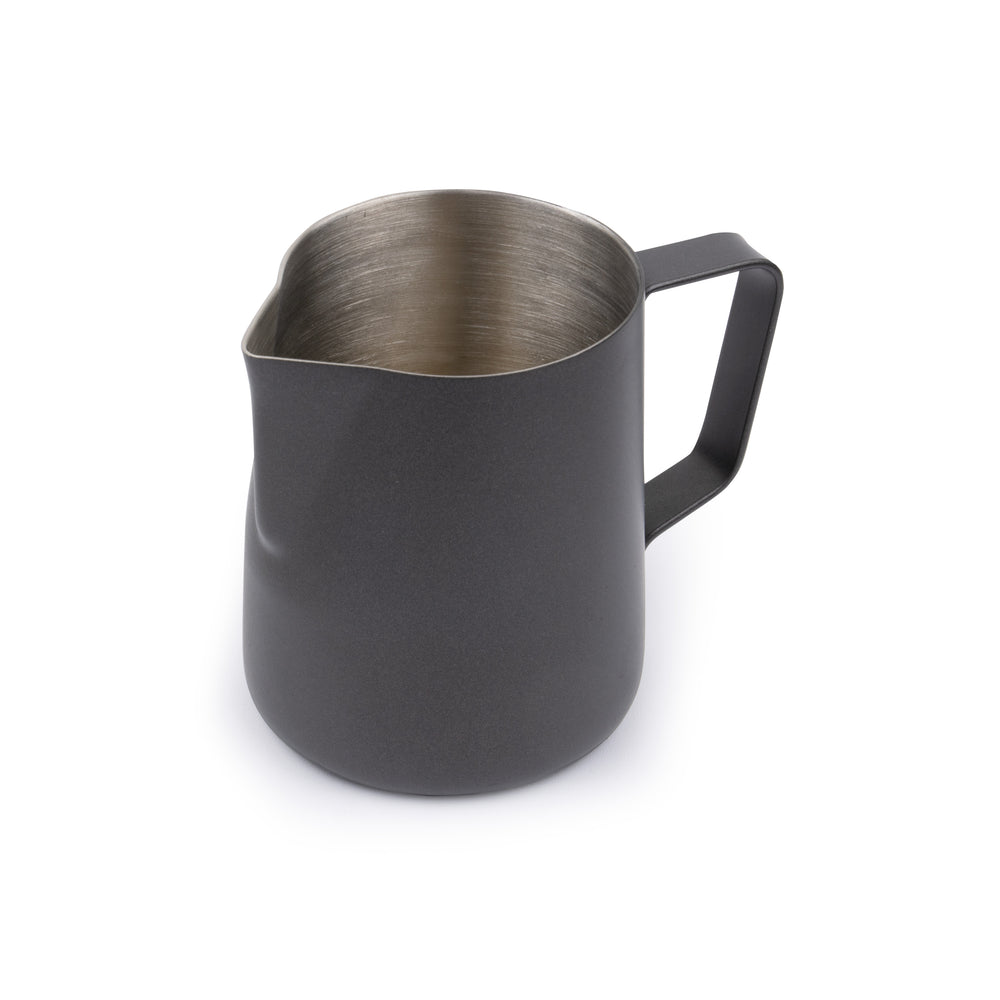 Steam milk for delicious cappuccinos, macchiatos, and other milk-based drinks with the 12oz Revolution Matte Black Steaming Pitcher. With a matte black exterior and proprietary teflon coating, this pitcher is built to last.
 -
 Varia’s SIP series glasses are crystal clear hand-blown borosilicate glasses with a dual wall design that insulates your beverage for comfortable holding while providing the illusion that your drink is floating in the air.
 -
 Wiedemann's Milk Jug is a reliable 11.8oz frothing pitcher made from food grade stainless steel with internal measurements for consistent drink prep.
 -
 KINTO CAST cups and mugs are designed to interfere as little as possible with the enjoyment of your beverage. Perfectly balanced and made from lightweight, airy glass, drinking from CAST vessels is a relaxing, almost magical experience.


Related Articles

Best Non-Dairy Milk for Coffee

The Gaggia Classic GT Dual-Boiler Review