 USA
USA


Trying Out the iSi Line
As much as I love coffee, sometimes I want to shake up my usual morning latte, and with these products from iSi, you can add something new to your mornings. Whether you want plain seltzer to use as a palate cleanser between shots of espresso, a fresh homemade whipped cream to top off your coffee with, or to get nitro cold brew coffee at home, iSi has the products for you.
Founded in 1964, iSi is a market leader in pressurized gas products, and their products range from ones designed for home use all the way to culinary, restaurant-grade tools. Their brand has a focus on sustainability, and the gas-filled “chargers” used for their products are fully recyclable and climate-neutral.
I got the chance to test out some of these fun and exciting products, and I was not disappointed by the results. I even came up with a few recipes to make it easy to add something new to your morning coffee (or your happy hour cocktails). Here’s what I found when testing out the Sodamaker Classic, Cream Profi Whip, and Nitro Whip from iSi.

Details on the Nitro Whip.
The Sodamaker Classic
You’ll feel like you stepped back a few decades when you set your sights on the iSi Sodamaker Classic. This soda maker has a hard plastic body, but the show stopper is the stainless steel criss-cross mesh that surrounds it. Even the lever that you press down on to dispense your soda has a curve that harkens back to mid-century design sensibilities. As someone who has a lot of vintage mid-century furniture in their home, I found that this soda maker fit right in.
-
 Making seltzer to use as a palate cleanser while tasting coffees or as a base for at-home soda recipes has never been easier (or more stylish) than with the iSi Sodamaker Classic.
 -
 iSi Soda Chargers allow you to add carbonation to your drinks when used with the iSi Sodamaker Classic.


Using the Sodamaker Classic is simple as well. You just fill the soda maker with water up to the max fill line, screw on a soda charger capsule, shake at least 5 times, then remove the capsule, replace it with the included cap, and dispense your seltzer! iSi recommends dispensing plain carbonated water from the soda maker and adding your flavorings after dispensing to make sure that nothing gets caught in the tube inside the soda maker, and I can see why that would be very difficult to clean between uses. If you’ve used an at-home soda maker before, this is pretty standard practice.
The first time I used the Sodamaker Classic I used room temperature water, and this mistake led to me not getting very carbonated soda as a result. Make sure that you’re using ice cold water to get the best carbonation – the colder the water is, the less CO2 will dissolve in the water to leave you with flat water instead of seltzer.
If you’re setting up a coffee or espresso taste comparison, this soda maker will definitely come in handy. You can whip up some seltzer to fully cleanse your palate in about a minute, so you can really make sure you’re tasting the unique notes in your coffee.
In all, this was an easy-to-use soda maker that created great seltzer to drink on its own or use as a base for flavored seltzer or soda. The stylish design means it will fit in nicely on your coffee bar (or regular bar), and the operation is simple enough for anyone to make delicious seltzer at home.
Coffee Soda Recipe
Naturally, the first recipe I wanted to try out for the Sodamaker Classic besides plain seltzer was a coffee soda. I went through a few iterations trying to strike the right balance between making a drink sweet enough to be soda but distinct enough to be coffee, and this is what I came up with. This drink is perfect for mornings when you don’t really need a full pick me up, but you know just the taste of coffee will put a little pep in your step.

The Sodamaker Classic with the different coffee soda syrup flavors.
Ingredients
- ⅔ cup coffee (I used Whole Latte Love’s Crema Wave)
- ⅓ cup of sugar
- For cinnamon coffee soda: 1 cinnamon stick
- For vanilla coffee soda: ¼ tsp vanilla extract or the contents of a vanilla bean
Directions
- Make your coffee soda syrup. To do this, brew your coffee slightly stronger that usual, then combine it with your sugar in a saucepan over medium-high heat. Once it comes to a boil, reduce the heat and let it simmer for 20-30 minutes, stirring occasionally. If you want a thicker syrup, let it simmer for longer (and vice versa for a thinner syrup). Once it’s done simmering, let cool and then transfer to an airtight container and refrigerate. This syrup is good in the fridge for up to a month.
- For cinnamon coffee syrup, add your cinnamon stick to the coffee and sugar mixture in the saucepan as soon as it goes on the stove. Remove the cinnamon stick before pouring into your airtight container.
- For vanilla coffee syrup with vanilla bean, scrape the inside of a vanilla bean and add it to the coffee and sugar mixture as soon as the saucepan goes on the stove. Strain the mixture into your airtight container to get out larger pieces of vanilla bean. To make it with vanilla extract, add your extract to the coffee and sugar mixture once the saucepan is removed from heat before pouring into your airtight container.
- Make your seltzer in your Soda Dispenser and pour it into a glass filled with ice.
- Add coffee syrup into your seltzer to fit your taste preferences, and stir until well mixed.
- Enjoy!

Dispensing carbonated water to make coffee soda.
The Cream Profi Whip
If you’re looking for an easy way to make whipped cream at home, it doesn’t get much easier that using the Cream Profi Whip. In the past when I wanted to make fresh whipped cream, I would have to spend a while waiting for it to whip up in a stand mixer or holding a hand mixer for god knows how long waiting for the whipped cream to be read to enjoy. And if I didn’t use all of it up within an hour or two, it would start losing its fluffiness and be kind of disappointing the next time I went to use it.
-
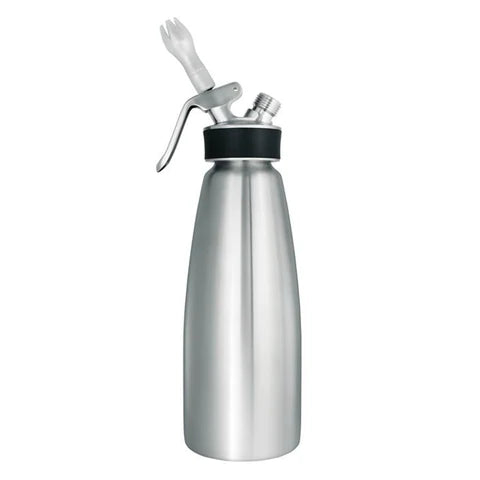 Create homemade whipped cream and other cold desserts with the compact iSi Cream Profi Whip 1 Quart.
 -
 Create homemade whipped cream and other cold desserts with the compact iSi Cream Profi Whip 1 Pint.
 -
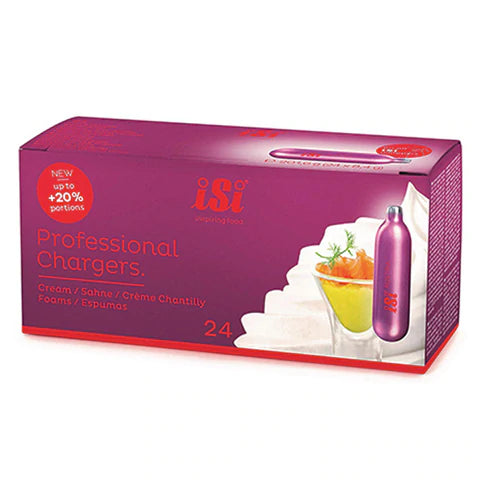 Charge up your iSi Cream Profi Whip using these iSi Professional Cream Chargers. Each charger includes 8.4g of N20.


With the Cream Profi Whip, all I had to do was combine the whipped cream ingredients, give them a light whisk to combine, and then charge it with the NO2 charger, and I have fresh whipped cream in under a minute. The best part is that since the container stays pressurized like store-bought whipped cream containers, you can have fresh whipped cream for days from the same batch.
Cleaning is surprisingly easy as well since spout and connecting pieces are removable and a small pipe-cleaner-like brush is included with the whipper. I did notice that even when I thought all of the whipped cream was gone from the container it wasn’t always the case, which can result in a mess. To make sure it’s completely empty, shake up the contents and ensure you’re dispensing whipped cream while the container is upside down. Try to squeeze out all the air you can before removing the lid to avoid a splatter of whipped cream all over yourself, and I would definitely recommend opening the top of the container over a sink so that any small bits that didn’t get dispensed don’t end up all over your kitchen. This was a lesson I learned the hard way, though my dog was very excited to lick the extra whipped cream off the ground when it splattered there.
Flavored Whipped Cream
Homemade whipped cream on its own is a delicious treat whether it’s used as a topping or as a standalone midnight snack, and with this base recipe, you can easily whip some regular whipped cream up. I have a few optional ingredients listed as well that you can add to add something a little special to your whipped cream.

The ingredients you need for espresso whipped cream.
Ingredients
- 1 cup heavy whipping cream
- 3 tablespoons powdered sugar
- ½ teaspoon vanilla extract
- For espresso whipped cream: 1 teaspoon finely ground espresso powder
- For cinnamon whipped cream: ½ teaspoon ground cinnamon
- For caramel whipped cream: 2 tablespoons caramel sauce
Directions
- Combine all ingredients in the Cream Profi Whip. Whisk together until the sugar, vanilla extract, and optional other ingredients are incorporated.
- Put on the lid of the Cream Profi Whip and follow all usual directions for use.
- Dispense delicious whipped cream on your coffee or dessert and enjoy!

Espresso whipped cream and the Cream Profi Whip.
Nitro Whip
I’m a huge fan of cold brew coffee, and when I found out that I was getting to test out something that would let me make nitro cold brew at home I was very excited. The iSi Nitro Whip definitely did not disappoint, and I loved making nitro drinks at home.
-
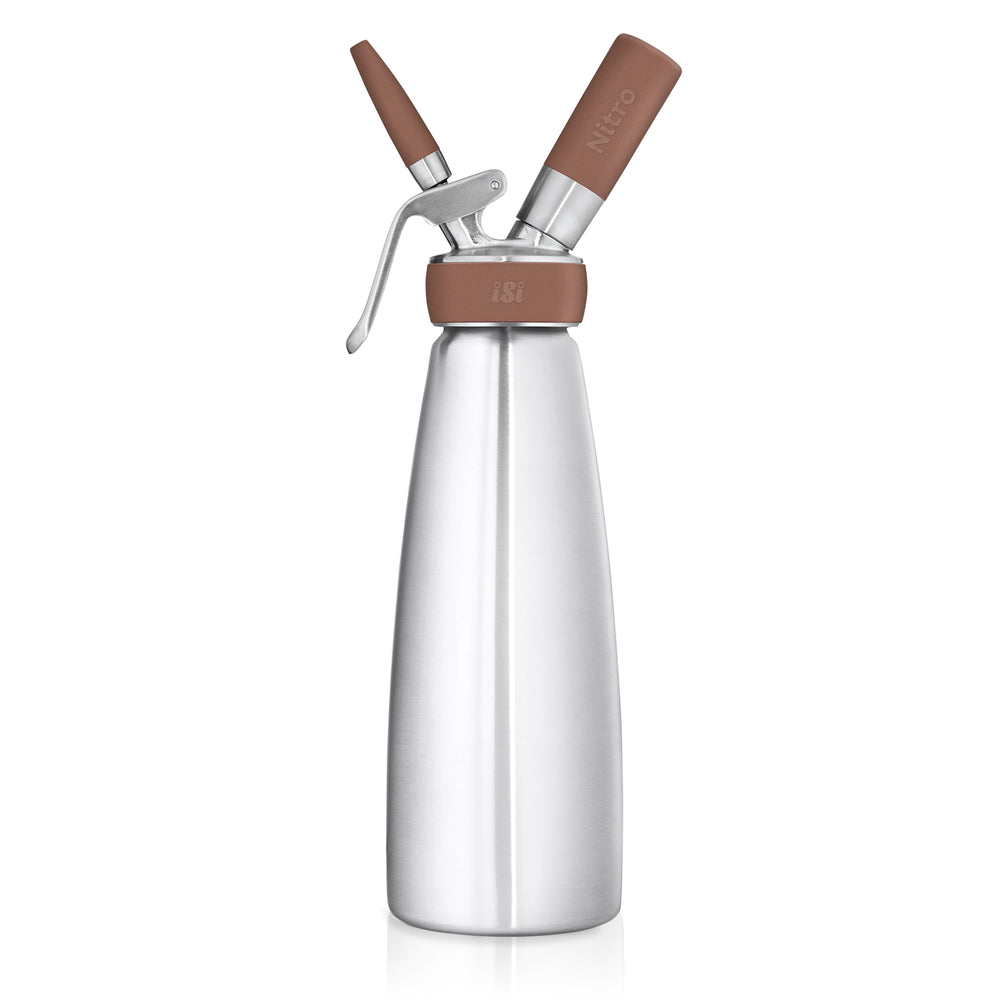 Enjoy the velvety, creamy texture of nitro cold brew coffee, iced tea, cocktails, and more in the comfort of your own home with the iSi Nitro Whip.
 -
 The iSi Nitro Whip allows you to inject pure nitrogen into your drinks for a creamy, velvety texture to cold brew coffee, iced tea, cocktails, and more. Each time you use the Nitro Whip, you need to use one iSi Nitro Charger. Each canister comes with 2.4g of pure nitrogen encapsulated in recyclable steel. This is a pack of 16 chargers. iSi Nitro Whip sold separately.


Using the Nitro Whip was really easy. All you do is brew your cold brew using your preferred method (I used an Espro P3 French Press), pour it into the Nitro Whip, screw on the charger filled with pure nitrogen, and give the canister a few shakes. After that, you’re ready to flip the container and pour out some delicious nitro cold brew. Nitro cold brew is creamy and thicker than your average coffee, and the texture adds a really fun twist to the drink.
Nitro Cold Brew Lemonade
I’m a big fan of mixing lemon and coffee (like in the sparkling iced americano in the Iced Coffee Blog), so I knew I wanted to try this recipe as soon as I got the Nitro Whip in my hands. This drink is a perfect, refreshing drink to enjoy all summer long, and it’s become a favorite of mine among all of the recipes I’ve tested out.

The ingredients for a Nitro cold brew lemonade.
Ingredients
For the lemon simple syrup
- Zest from 4-5 lemons
- 1 cup sugar
- 1 cup boiling water
For the drink
- 1 cup of fresh lemon juice*
- 3 cups of cold water*
- 1 cup of nitro cold brew
*for a less tart lemonade, you can use less lemon juice or add more water
Directions
- To make your lemon simple syrup, combine the lemon zest and sugar in a bowl and mix. Let it sit overnight in an airtight container. The next day, add 1 cup of boiling water and whisk until the sugar dissolves. Strain out the zest and let the syrup cool completely in the fridge before use.
- To make your lemonade, combine the lemon juice and water in a pitcher and add the simple syrup to your sweetness preference. Refrigerate until you’re ready to serve.
- To make your final drink, pour in your lemonade to fill half of your glass, and then pour your nitro cold brew from the Nitro Whip.
- Enjoy!

Nitro cold brew lemonade and the Nitro Whip.
Nitro Gin Lemonade
If you have any lemonade leftover from your Nitro Cold Brew Lemonade once it hits 5 pm, this delicious cocktail is a great way to mix up your usual gin lemonade. The sweetness of your homemade lemonade pairs very well with the botanical flavor of gin, and when they’re injected with the pure nitrogen from the Nitro Whip you’re in for a deliciously smooth and creamy beverage.
Ingredients
- 1 cup cold lemonade
- 1 shot of chilled gin (I used a locally distilled lilac gin for an especially refreshing drink)
- Ice
Directions
- Add your lemonade and gin to the Nitro Whip and follow the usual use instructions.
- Dispense your gin lemonade into the glass.
- Garnish with a lemon peel and enjoy!
Coffee Soda Ice Cream Float
I personally love ice cream floats, and as the weather heats up I love making them at home. This recipe is a fun variation on your favorite ice cream float, and I have a feeling I’ll be making these quite a few times this summer.

The ingredients for a coffee soda ice cream float.
Ingredients
- 1 ½ cups of coffee soda
- 1 scoop of vanilla ice cream
- Espresso whipped cream
Directions
- Make your coffee soda according to the recipe above. Dispense into a separate glass to stir in the syrup.
- Add your scoop of ice cream to your glass.
- Pour in your assembled coffee soda.
- Add espresso whipped cream to your liking.
- Enjoy!

A delicious coffee soda ice cream float.
In Conclusion
If you’re looking for something to spice up your usual coffee setup, these products from iSi are a great way to refresh your routine. Whether you want to make fresh whipped cream daily to add on top of your coffee or you love nitro cold brew and want to make it at home, you can add something new to your brew.
Did you try any of these products or recipes out? Make sure to leave a review on the product pages and tag us in any pictures of your creations on Instagram, Facebook, Twitter, and TikTok. To stay up to date on new products, fresh recipes, and promotions, make sure to follow us on Pinterest and YouTube and subscribe to our email list and text messages.